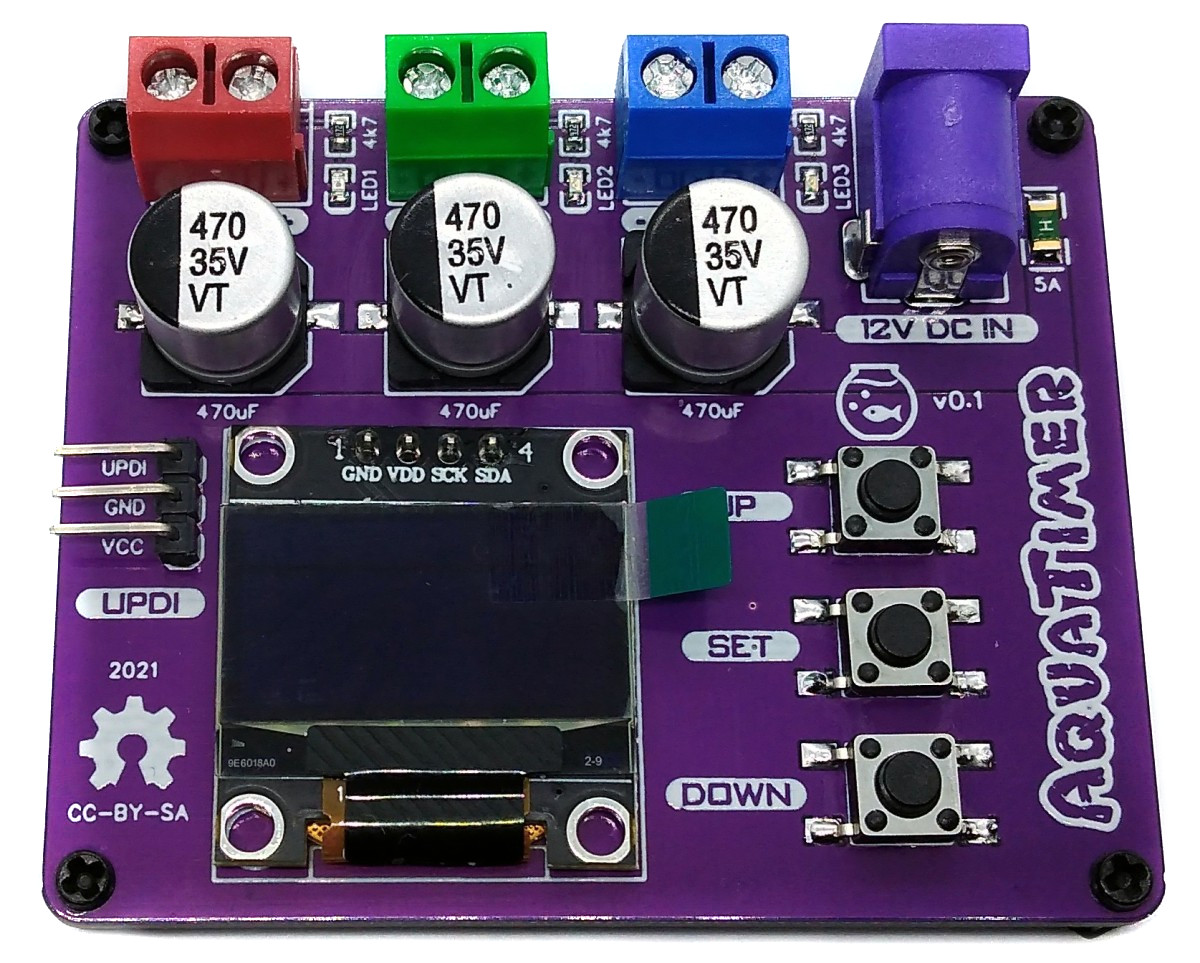
AquaTimer is a programmable timer for 12V devices such as lighting, solenoid valves or pumps not only for aquariums. It has three switchable channels for currents up to 2A each and up to 5A in total. Connected lighting can be dimmed if desired and slowly faded in and out to simulate sunrises and sunsets. The internal RTC of the ATtiny is used as a clockwork in conjunction with a 32.768kHz crystal. A backup battery keeps the clock running even if the external power supply is interrupted. Settings are made using three buttons and the OLED display.
- Design Files (EasyEDA): https://easyeda.com/wagiminator/attiny814-aquacontroller
- Open your Arduino IDE.
- Make sure you have installed megaTinyCore.
- Go to Tools -> Board -> megaTinyCore and select ATtiny1614/1604/814/804/414/404/214/204.
- Go to Tools and choose the following board options:
- Chip: ATtiny1614 or ATtiny814 or ATtiny414
- Clock: 5 MHz internal
- Leave the rest at the default settings.
- Connect your programmer to your PC and to the UPDI header on the board.
- Go to Tools -> Programmer and select your UPDI programmer.
- Go to Tools -> Burn Bootloader to burn the fuses.
- Open the sketch and click Upload.
- Connect your programmer (jtag2updi or SerialUPDI) to your PC and to the UPDI header on the board.
- Make sure you have installed the latest avr-gcc toolchain.
- Open a terminal.
- Navigate to the folder with the makefile and the sketch.
- Run
DEVICE=attiny814 PROGRMR=serialupdi PORT=/dev/ttyUSB0 make installto compile, burn the fuses and upload the firmware (change DEVICE, PROGRMR and PORT accordingly).
The device time is automatically set to the current time (compilation time) when the firmware is uploaded. Install the CR1220, CR1225 or LIR1220 (recommended) buffer battery before disconnecting the device.
- Connect the devices to be controlled to the AquaTimer using the screw terminals. Pay attention to the correct polarity!
- Connect the AquaTimer to a 12V power supply via the DC barrel connector.
- Press the "SET" button to get to the main menu. Adjust the values according to your wishes.


This work is licensed under Creative Commons Attribution-ShareAlike 3.0 Unported License. (http://creativecommons.org/licenses/by-sa/3.0/)