Quickly and easily create / train a custom DeepDream model

Overview

Dream-Creator

This project aims to simplify the process of creating a custom DeepDream model by using pretrained GoogleNet models and custom image datasets.

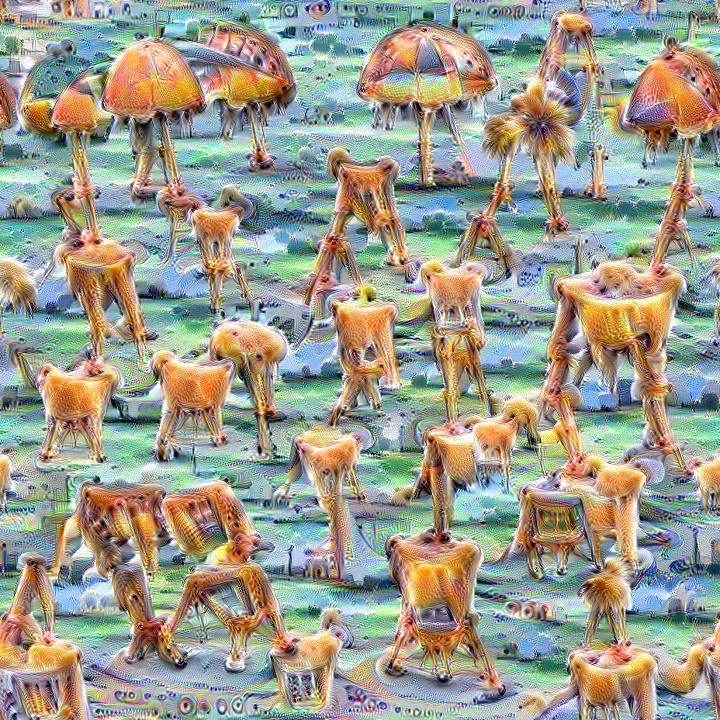
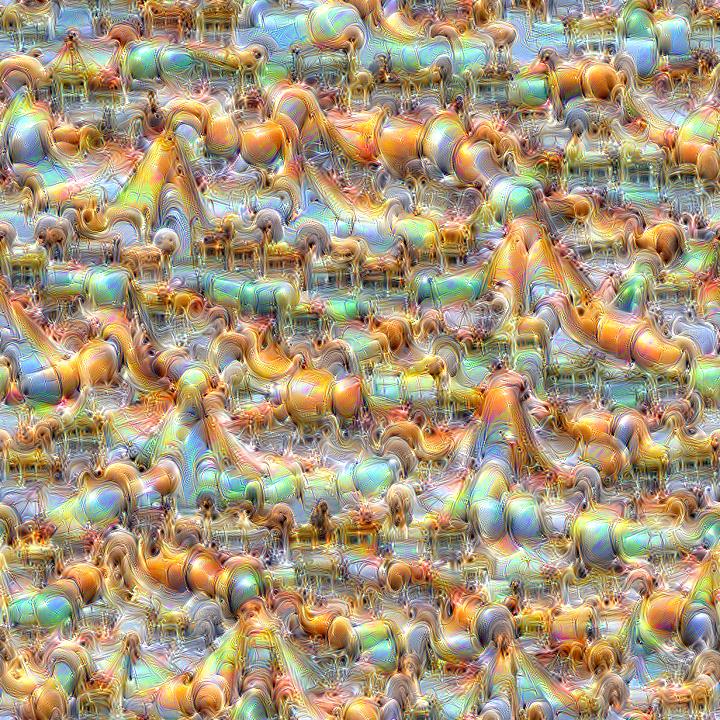
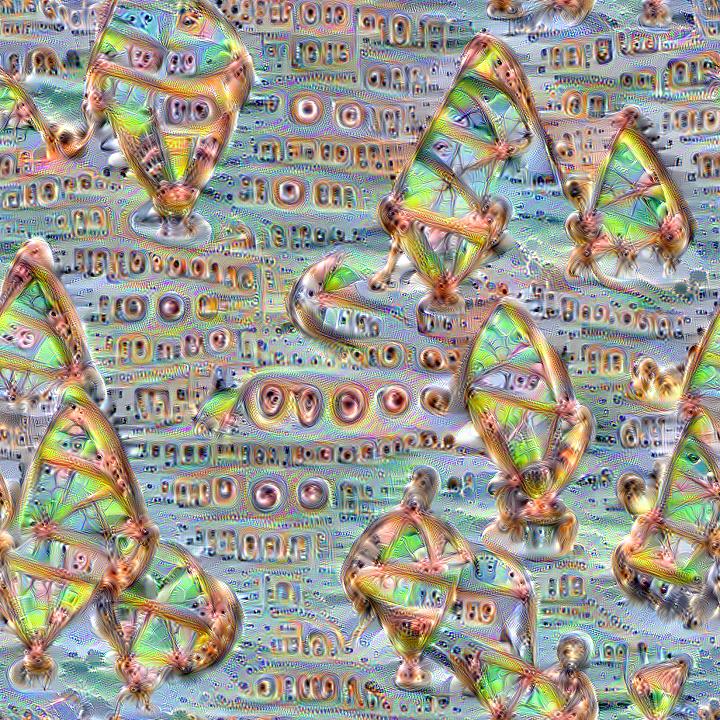
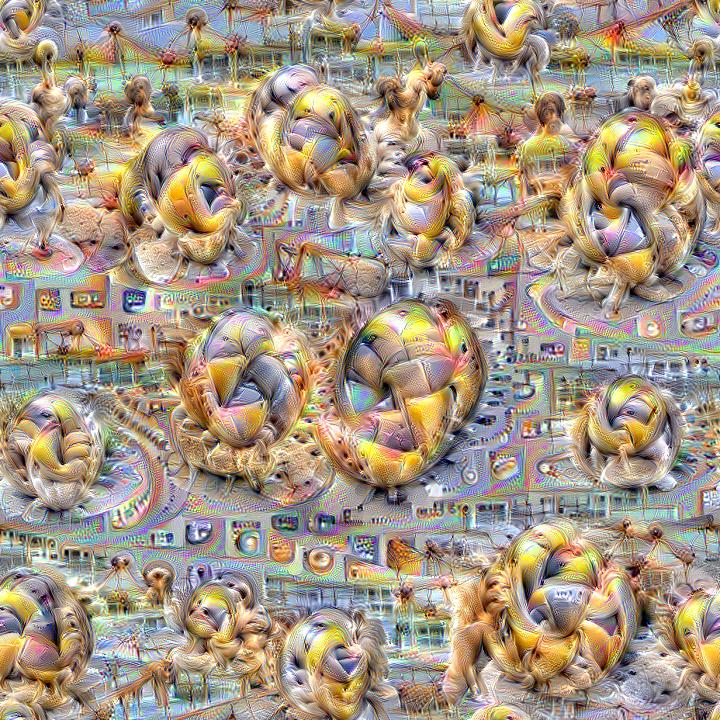
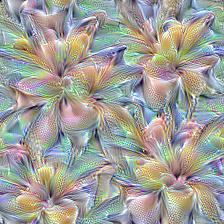
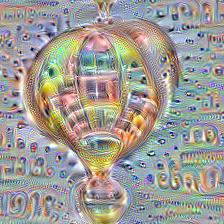
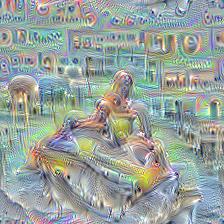
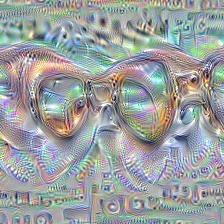
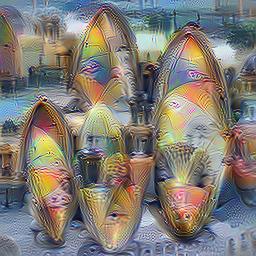
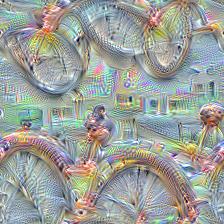
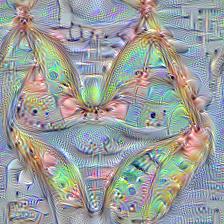
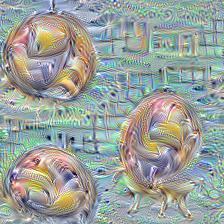
Here are some example visualizations created with custom DeepDream models trained on summer themed images:


Setup:

Dependencies:

You can find detailed installation instructions for Ubuntu and Windows in the installation guide.

After making sure that PyTorch is installed, you can optionally download the Places365 GoogleNet and Inception5h (InceptionV1) pretrained models with the following command:

python models/download_models.py

If you just want to create DeepDreams with the pretrained models or you downloaded a pretrained model made by someone else with Dream-Creator, then you can skip ahead to visualizing models.

Getting Started

  1. Create & Prepare Your Dataset

    1. Collect Images

    2. Sort images into the required format.

    3. Remove any corrupt images.

    4. Ensure that any duplicates are removed if you have not done so already

    5. Resize the dataset to speed up training.

    6. Calculate the mean and standard deviation of your dataset.

  2. Train a GoogleNet model

  3. Visualize the results

  4. If the results are not great, then you may have to go back to step 1-2 and make some changes with what images, categories, and training parameters are used.

It can take as little as 5 epochs to create visualizations that resemble your training data using the main FC/Logits layer. In order to speed up training and create better looking results, the pretrained BVLC model used is partially frozen in order to protect the lower layers from changing.


Dataset Creation

In order to train a custom DeepDream model, you will need to create a dataset composed of images that you wish to use for training. There are a variety of ways that you can aquire images for your dataset, and you will need at least a couple hundred images for each category/class.

DeepDream is most often performed with image classification models trained on image datasets that are composed of different categories/classes. Image classification models attempt to learn the difference between different image classes and in doing so the neurons gain the ability to create dream-like hallucinations. The images you choose, the differences between them, the differences between your chosen classes, and the number of images used will greatly affect the visualizations that can be produced.

PyTorch image datasets are to be structured where the main directory/folder contains subfolders/directories for each category/class. Below an example of the required dataset structure is shown:

dataset_dir
│
└───category1
│   │   image1.jpg
│   │   image2.jpg
│   │   image3.jpg
│
└───category2
    │   image1.jpg
    │   image2.jpg
    │   image3.jpg

Once you have created your dataset in the proper format, make sure that you remove any duplicate images if you have not done so already. There are a variety of tools that you can use for this task, including free and open source software.

If you have not done so already, you may wish to create a backup copy of your dataset.

Next you will need to verify that none of the images are corrupt in such a way that prevents PyTorch from loading them. To automatically remove any corrupt images from your dataset, use the following command:

python data_tools/remove_bad.py -delete_bad -data_path <training_data>

Next you will likely want to resize your dataset to be closer to the training image size in order to speed up training. Resizing your dataset will not prevent you from creating larger DeepDream images with the resulting model. The included resizing script will only modify images that go above the specified image size with their height or width.

To resize the images in your dataset, use the following command:

python data_tools/resize_data.py -data_path <training_data> -max_size 500

Now with your newly resized dataset, you can calculate the mean and standard deviation of your dataset for use in training, and DeepDreaming. Make sure to recalculate the mean and standard deviation again if you modify the dataset by adding or removing images.

To calculate the mean and standard deviation of your dataset, use the following command and save the output for the next step:

python data_tools/calc_ms.py -data_path <training_data>

Now you can start training your DeepDream model by running the GoogleNet training script. It's recommended that you save the model every 5-10 epochs in order to monitor the quality of the visualizations.

After training your models, you can add a color correlation matrix to them for color decorrelation with the following command:

python data_tools/calc_cm.py -data_path <training_data> -model_file <bvlc_out120>.pth

GoogleNet Training

Basic training command:

python train_googlenet.py -data_path <training_data> -balance_classes -batch_size 96 -data_mean <mean> -data_sd <sd>

Input options:

  • -data_path: Path to the dataset directory/folder that you wish to use.
  • -data_mean: Your precalculated list of mean values for your chosen dataset.
  • -data_sd: Your precalculated list of standard deviation values for your chosen dataset.

Training options:

  • -num_epochs: The number of training epochs to use. Default is 120.
  • -batch_size: The number of training and validation images to put through the network at the same time. Default is 32.
  • -learning_rate: Learning rate to use with the ADAM or SGD optimizer. Default is 1e-2.
  • -optimizer: The optimization algorithm to use; either sgd or adam; default is sgd.
  • -train_workers: How many workers to use for training. Default is 0.
  • -val_workers: How many workers to use for validation. Default is 0.
  • -balance_classes: Enabling this flag will balance training for each class based on class size.

Model options:

  • -model_file: Path to the .pth model file to use for the starting model. Default is the BVLC GoogleNet model.
  • -freeze_to: Which layer to freeze the model up to; one of none, conv1, conv2, conv3, mixed3a, mixed3b, mixed4a, mixed4b, mixed4c, mixed4d, mixed4e, mixed5a, or mixed5b. Default is mixed3b.
  • -freeze_aux1_to: Which layer to freeze the first auxiliary branch up to; one of none, loss_conv, loss_fc, or loss_classifier. Default is none.
  • -freeze_aux2_to: Which layer to freeze the second auxiliary branch up to; one of none, loss_conv, loss_fc, or loss_classifier. Default is none.
  • -delete_branches: If this flag is enabled, no auxiliary branches will be used in the model.

Output options:

  • -save_epoch: Save the model every save_epoch epochs. Default is 10. Set to 0 to disable saving intermediate models.
  • -output_name: Name of the output model. Default is bvlc_out.pth.
  • -individual_acc: Enabling this flag will print the individual accuracy of each class.
  • -save_csv: Enabling this flag will save loss and accuracy data to txt files.
  • -csv_dir: Where to save csv files. Default is set to current working directory.

Other options:

  • -use_device: Zero-indexed ID of the GPU to use plus cuda:. Default is cuda:0.
  • -seed: An integer value that you can specify for repeatable results. By default this value is random for each run.

Dataset options:

  • -val_percent: The percentage of images from each class to use for validation. Default is 0.2.

Visualizing Results

Visualizing GoogleNet FC Layer Results

After training a new DeepDream model, you'll need to test it's visualizations. The best visualizations are found in the main FC layer also known as the 'logits' layer. This script helps you quickly and easily visualize all of a specified layer's channels in a particular model for a particular model epoch, by generating a separate image for each channel.

Input options:

  • -model_file: Path to the pretrained GoogleNet model that you wish to use.
  • -learning_rate: Learning rate to use with the ADAM or L-BFGS optimizer. Default is 1.5.
  • -optimizer: The optimization algorithm to use; either lbfgs or adam; default is adam.
  • -num_iterations: Default is 500.
  • -layer: The specific layer you wish to use. Default is set to fc.
  • -extract_neuron: If this flag is enabled, the center neuron will be extracted from each channel.
  • -image_size: A comma separated list of <height>,<width> to use for the output image. Default is set to 224,224.
  • -jitter: The amount of image jitter to use for preprocessing. Default is 16.
  • -fft_decorrelation: Whether or not to use FFT spatial decorrelation. If enabled, a lower learning rate should be used.
  • -color_decorrelation: Whether or not to use color decorrelation. Optionally provide a comma separated list of values for the color correlation matrix. If no values are provided, an attempt to load a color correlation matrix from the model file will be made before defaulting to the ImageNet color correlation matrix.
  • -random_scale: Whether or not to use random scaling. Optionally provide a comma separated list of values for scales to be randomly selected from. If no values are provided, then scales will be randomly selected from the following list: 1, 0.975, 1.025, 0.95, 1.05.
  • -random_rotation: Whether or not to use random rotations. Optionally provide a comma separated list of degree values for rotations to be randomly selected from or a single value to use for randomly selecting degrees from [-value, value]. If no values are provided, then a range of [-5, 5] wil be used.
  • -padding: The amount of padding to use before random scaling and random rotations to prevent edge artifacts. The padding is then removed after the transforms. Default is set to 0 to disable it.

Processing options:

  • -batch_size: How many channel visualization images to create in each batch. Default is 10.
  • -start_channel: What channel to start creating visualization images at. Default is 0.
  • -end_channel: What channel to stop creating visualization images at. Default is set to -1 for all channels.

Only Required If Model Doesn't Contain Them, Options:

  • -model_epoch: The training epoch that the model was saved from, to use for the output image names. Default is 120.
  • -data_mean: Your precalculated list of mean values that was used to train the model, if they weren't saved inside the model.
  • -num_classes: The number of classes that the model was trained on. Default is 120.

Output options:

  • -output_dir: Where to save output images. Default is set to the current working directory.
  • -print_iter: Print progress every print_iter iterations. Set to 0 to disable printing.
  • -save_iter: Save the images every save_iter iterations. Default is to 0 to disable saving intermediate results.

Other options:

  • -use_device: Zero-indexed ID of the GPU to use plus cuda:. Default is cuda:0.
  • -seed: An integer value that you can specify for repeatable results. By default this value is random for each run.

Basic FC (logits) layer visualization:

python vis_multi.py -model_file <bvlc_out120>.pth

Advanced FC (logits) layer visualization:

python vis_multi.py -model_file <bvlc_out120>.pth -layer fc -color_decorrelation -fft_decorrelation -random_scale -random_rotation -lr 0.4 -output_dir <output_dir> -padding 16 -jitter 16,8

Performing DeepDream With Your Newly Trained Model

This script lets you create DeepDream hallucinations with trained GoogleNet models.

Input options:

  • -model_file: Path to the pretrained GoogleNet model that you wish to use.
  • -learning_rate: Learning rate to use with the ADAM or L-BFGS optimizer. Default is 1.5.
  • -optimizer: The optimization algorithm to use; either lbfgs or adam; default is adam.
  • -num_iterations: Default is 500.
  • -content_image: Path to your input image. If no input image is specified, random noise is used instead.
  • -layer: The specific layer you wish to use. Default is set to mixed5a.
  • -channel: The specific layer channel you wish to use. Default is set to -1 to disable specific channel selection.
  • -extract_neuron: If this flag is enabled, the center neuron will be extracted from the channel selected by the -channel parameter.
  • -image_size: A comma separated list of <height>,<width> to use for the output image. If a single value for maximum side length is provided along with a content image, then the minimum side length will be calculated automatically. Default is set to 224,224.
  • -jitter: The amount of image jitter to use for preprocessing. Default is 16.
  • -fft_decorrelation: Whether or not to use FFT spatial decorrelation. If enabled, a lower learning rate should be used.
  • -color_decorrelation: Whether or not to use color decorrelation. Optionally provide a comma separated list of values for the color correlation matrix. If no values are provided, an attempt to load a color correlation matrix from the model file will be made before defaulting to the ImageNet color correlation matrix.
  • -random_scale: Whether or not to use random scaling. Optionally provide a comma separated list of values for scales to be randomly selected from. If no values are provided, then scales will be randomly selected from the following list: 1, 0.975, 1.025, 0.95, 1.05.
  • -random_rotation: Whether or not to use random rotations. Optionally provide a comma separated list of degree values for rotations to be randomly selected from or a single value to use for randomly selecting degrees from [-value, value]. If no values are provided, then a range of [-5, 5] wil be used.
  • -padding: The amount of padding to use before random scaling and random rotations to prevent edge artifacts. The padding is then removed after the transforms. Default is set to 0 to disable it.
  • -layer_vis: Whether to use DeepDream or direction visualization when not visualizing specific layer channels. One of deepdream or direction; default is deepdream.

Only Required If Model Doesn't Contain Them, Options:

  • -data_mean: Your precalculated list of mean values that was used to train the model, if they weren't saved inside the model.
  • -num_classes: The number of classes that the model was trained on, if it wasn't saved inside the model.

Output options:

  • -output_image: Name of the output image. Default is out.png.
  • -print_iter: Print progress every print_iter iterations. Set to 0 to disable printing.
  • -save_iter: Save the images every save_iter iterations. Default is to 0 to disable saving intermediate results.

Tiling options:

  • -tile_size: The desired tile size to use. Either a comma separated list of <height>,<width> or a single value to use for both tile height and width. Default is set to 0 to disable tiling.
  • -tile_overlap: The percentage of overlap to use for the tiles. Default is 25 for 25% overlap. Overlap percentages over 50% will result in problems.
  • -tile_iter: Default is 50.

Other options:

  • -use_device: Zero-indexed ID of the GPU to use plus cuda:. Default is cuda:0.
  • -seed: An integer value that you can specify for repeatable results. By default this value is random for each run.

Basic DeepDream:

python vis.py -model_file <bvlc_out120>.pth -layer mixed5a

Advanced DeepDream:

python vis.py -model_file <bvlc_out120>.pth -layer mixed5a/conv_5x5_relu -channel 9 -color_decorrelation -fft_decorrelation -random_scale -random_rotation -lr 0.4 -padding 16 -jitter 16,8

Dataset Cleaning + Building & Visualization Tools

See here for more information on all the included scripts/tools relating to dataset creation, cleaning, and preparation.

Comments
  • Visualization fails when using custom image

    Visualization fails when using custom image

    Hello,

    Thank you for the great and easy to use repository. I was trying to train a custom deep dream module and then trying to run it on a custom image. While the system works flawlessly on random input (no -content_image), it fails when I try to set a custom content_img.

    The specific error I get is on (utils/decorrelation.py):

    ....
    def ifft_image(self, input):
         input = input * self.scale
    ....
    

    The error is a shape mismatch. My input image is 224x224 and the scale variable is 224x113 on the spatial dimension.

    I tried looking at the code and it seems the line (utils/decorrelation.py):

    fx = self.pytorch_fftfreq(self.w)[: self.w // 2 + wadd]

    returns the reduced spatial dimension. When the content image is not set, the script initializes a random input, which is incidentally 224x113, so there is no complain.

    Additionally, I also noticed that the random input tensor is initialized as torch.Size([1, 3, 224, 113, 2]). Which ends up with another error, when I do manage to patch the scale to be the same spatial dimension as the input. This is because my input (set by the -content_image) has the size torch.Size([1, 3, 224, 224]).

    So I was wondering if you have specific solution for this. And what is the 2 on the 5th dimension for the random input tensor.

    opened by Morpheus3000 8
  • getting an error while training GoogleNet on custom dataset

    getting an error while training GoogleNet on custom dataset

    Thanks for sharing your code. I ran your code on ellipse and rectangle and it worked but when I ran it on my own dataset ( Labeled Faced in the Wild-LFW) I get the below error: Total 7804 images, split into 1000 classes Classes: {'Aaron_Peirsol': 0, 'Abdoulaye_Wade': 1, 'Abdullah': 2, 'Abdullah_Gul': 3, 'Abdullah_al-Attiyah': 4, 'Abel_Pacheco': 5, 'Abid_Hamid_Mahmud_Al-Tikriti': 6, 'Adam_Sandler': 7,$ Traceback (most recent call last): File "dream-creator-master/train_googlenet.py", line 171, in main() File dream-creator-master/train_googlenet.py", line 51, in main main_func(params) File "dream-creator-master/train_googlenet.py", line 65, in main_func training_data, num_classes, class_weights = load_dataset(data_path=params.data_path, val_percent=params.val_percent, batch_size=params.batch_size,
    File "dream-creator-master/utils/training_utils.py", line 85, in load_dataset train_weights = [1 / train_class_counts[class_id] for class_id in range(num_classes)] File "dream-creator-master/utils/training_utils.py", line 85, in train_weights = [1 / train_class_counts[class_id] for class_id in range(num_classes)] KeyError: 169

    Do you have any idea how I can solve it, thanks.

    opened by mmitchef 2
  • Support for dream-creator models in neural-dream

    Support for dream-creator models in neural-dream

    I want to build my own models using Dream Creator and use them with neural-dream

    In the dream-creator-support branch you here: https://github.com/ProGamerGov/dream-creator/wiki/How-to-support-Dream-Creator-models-in-other-projects you say "Models only require the inceptionv1_caffe.py from the utils directory/folder and can be loaded like this:"

    Can you explain in more detail what this actually means? Do I use the inceptionv1_caffe.py from dream-creater? or do I edit the one in neural-dream. In short how do I use this? Thx! Mat

    opened by Bird-NZ 2
  • save_csv doesn't work

    save_csv doesn't work

    I am trying to save the accuracy for each class but it doesn't work. Do you have any idea how I can fix this.

    -save_csv: Enabling this flag will save loss and accuracy data to txt files.
    -csv_dir: Where to save csv files. Default is set to current working directory.
    

    inside of utils/train_model.py you have these lines of code

    def train_model(model, dataloaders, criterion, optimizer=None, lrscheduler=None, num_epochs=120, start_epoch=1, save_epoch=1, \
                    output_name='out.pth', device='cuda:0', has_branches=False, fc_only=False, num_classes=0, individual_acc = False, \
                    should_save_csv=False, csv_path='', save_info=None):
    
    opened by mmitchef 1
  • New features & bug fixes

    New features & bug fixes

    Bug Fixes:

    • Resolved confusion between BGR and RGB usage. Some custom models may need to be retrained.
    • Visualization scripts can now load all 3 starter models without errors.
    • The -seed parameter in the train_googlenet.py script should work more effectively now. Though this may not be the case if multiple training or validation workers are used.

    Changes:

    • The train_googlenet.py script now saves mean and standard deviation values in BGR format rather than RGB format.
    • The visualization scripts now expects mean and standard deviation values in BGR format rather than RGB format.
    • The calc_ms.py script now outputs normalization values in BGR format rather than RGB.
    • The vis_fc.py script has been replaced with vis_multi.py.

    New Features:

    • The new vis_multi.py script lets you visualize all channels in any specified layer, and lets you select a visualization batch size among other new features.
    • Added new tool to edit model file values, called edit_model.py.
    • Added new normalization value format attribute to models for easier handling of BGR and RGB models.
    • Added -use_rgb parameter to the calc_ms.py script for if you want the original behavior.

    To update your old models to the new correct format:

    python data_tools/edit_model.py -model_file <your-model.pth> -normval_format bgr -reverse_normvals -output_name <updated-model.pth>
    
    opened by ProGamerGov 1
  • AttributeError: module 'torch' has no attribute 'irfft'

    AttributeError: module 'torch' has no attribute 'irfft'

    if you are using torch 1.11.0 and getting this error "AttributeError: module 'torch' has no attribute 'irfft'"

    Solution: Replace all "torch.irfft" with "torch.fft.irfft"

    opened by mmitchef 0
  • Fix model class

    Fix model class

    I discovered that the Conv2d padding is different than torch.nn.functional padding, so I replaced all Conv2d padding with F.pad padding. I also discovered that the pooling layer in each InceptionModule was in the wrong spot.

    Bug fixes:

    • Replaced Conv2d padding with F.pad.
    • Fixed pool layer position in InceptionModule.
    opened by ProGamerGov 0
  • Transform improvements & DeepDream vs Direction clarification

    Transform improvements & DeepDream vs Direction clarification

    New Features:

    • The vis.py script now differentiates between direction visualization and DeepDream with the new -layer_vis parameter. The new parameter has two options, either deepdream or direction. The default is deepdream, and direction will result in the old behavior before this update. This parameter only works when no -channel value is specified.

    Improvements:

    • Improved random scaling based on the affine grid matrices that I learned about for: https://github.com/pytorch/captum/pull/500

    • Improvements to tensor normalization.

    • Center neuron extraction in the vis.py script now works for layer targets without specifying channels, though I'm not sure how useful this change will be.

    opened by ProGamerGov 0
  • Gigapixel image support & some error checking

    Gigapixel image support & some error checking

    Bug fixes:

    • The resize_data.py, find_bad.py, & vis.py scripts now support gigapixel images. Hopefully the Pillow/PIL DecompressionBombWarning warning no longer shows up. https://github.com/python-pillow/Pillow/issues/515, https://pillow.readthedocs.io/en/stable/reference/Image.html#PIL.Image.open You can manually change Image.MAX_IMAGE_PIXELS = 1000000000 to Image.MAX_IMAGE_PIXELS = None if you're still running into issues.

    • The vis.py script now checks that you specified the required number of image dimensions.

    Improvements:

    • General README improvements for color correlation matrices & color decorrelation.
    opened by ProGamerGov 0
  • Image size enhancements

    Image size enhancements

    Improvements:

    • When using a content image with the vis.py script, you can now only provide a single size dimension for the size of the largest dimension. Like before this update, if you provide two size values separated by a comma, then that exact specified size will be used.

    • The -tile_size parameter in the vis.py script now supports either a single value or two size values separated by a comma.

    opened by ProGamerGov 0
  • Fix tiling bug & improve README

    Fix tiling bug & improve README

    Improvements:

    • Added better surfboard example to README.

    Bug Fixes:

    • Resolved issue where if an edge tile overlap matched the regular overlap, then a blend mask mismatch would occur.
    opened by ProGamerGov 0
  • Values for color decorrelation

    Values for color decorrelation

    Hi! Again many thanks for this extensive implementation of the model.

    Could you document guidelines to decide on values for a color decorrelation matrix?

    I can not find guidelines on other deepdream fora.

    Hope you can shed some insight!

    opened by jossevessies 1
  • Cannot acces align_corners ... torch parameter

    Cannot acces align_corners ... torch parameter

    Hiya!

    Thank you for this amazing and super userfriendly git!

    I have one question... maybe it's more of a question, then an issue.

    I want to set the align_corners parameter of torch to True (it's default is set to false). To avoid some pixelated outcomes, as happens now cause i am making an upscaling animation deepdream with this material (which works pretty much to satisfaction btw!) I can not find the correct place in the codes to change align_corners.

    Have any idea maybe? I am using vis.py and vis_utils.py

    opened by jossevessies 0
  • KeyError: 667 when trying to save accuracy of each class

    KeyError: 667 when trying to save accuracy of each class

    I am trying to save accuracy of each class using the below script python train_googlenet.py -data_path CelebA -balance_classes -batch_size 64 -num_epochs 1000 -optimizer sgd -freeze_to conv1 -data_mean 92.1754,109.4887,143.2121 -data_sd 60.3302,63.6089,73.3 -save_epoch 50 -output_name bvlc_conv1/bvlc_out.pth -individual_acc -save_csv -csv_dir bvlc_conv1

    But, it gave me following error. Do you have any idea where this error is coming from? Thanks

    Total 30026 images, split into 1000 classes
    Classes:
     {'CA1': 0, 'CA10': 1, 'CA100': 2, 'CA1000': 3, 'CA1001': 4, 'CA101': 5, 'CA102': 6, 'CA103': 7, 'CA104': 8, 'CA105': 9, 'CA106': 10, 'CA107': 11, 'CA108': 12, 'CA109': 13, 'CA11': 14, 'CA110': 15, 'CA111': 16, 'CA112': 17, 'CA113': 18, 'CA114': 19, '$
    Model has 13,378,280 learnable parameters
    
    Epoch 1/1000
    ------------
    train Loss: 11.0882 Acc: 0.0009
      Class Acc: {0: 47.62, 1: 0.0, 2: 0.0, 3: 0.0, 4: 0.0, 5: 0.0, 6: 0.0, 7: 0.0, 8: 0.0, 9: 0.0, 10: 0.0, 11: 0.0, 12: 0.0, 13: 0.0, 14: 0.0, 15: 0.0, 16: 0.0, 17: 0.0, 18: 0.0, 19: 0.0, 20: 0.0, 21: 0.0, 22: 0.0, 23: 0.0, 24: 0.0, 25: 0.0, 26: 0.0, 27$
      Time Elapsed 1m 45s
    Traceback (most recent call last):
      File "./dream-creator-master/train_googlenet.py", line 171, in <module>
        main()
      File "./dream-creator-master/train_googlenet.py", line 51, in main
        main_func(params)
      File "./dream-creator-master/train_googlenet.py", line 163, in main_func
        train_model(model=cnn, dataloaders=training_data, criterion=criterion, optimizer=optimizer, lrscheduler=lrscheduler, \
      File "./dream-creator-master/utils/train_model.py", line 72, in train_model
        class_acc[c_val] = (class_acc[c_val].item() / data_counts[phase][c_val]) * 100
    KeyError: 667
    
    opened by mmitchef 0
  • Training a model without resulting in animal faces.

    Training a model without resulting in animal faces.

    I'm using "https://github.com/ProGamerGov/neural-dream/tree/dream-creator-support" to augment & warp images I have to create new interesting images.

    What I want to do is convey a mood into a photo. eg ie I have 1000 smiling faces (only 1 class) I want to train a model with just these faces and then use dream creator to apply this model to an image and start to see the mood "twist" into the photo.

    Issue: I keep getting residual animals coming through in my twisted images I apply my dream-creator model to. How can I train a model on ONLY my images and not take any pre trained data in?

    opened by Bird-NZ 5
Releases(v1.0.0)
PyTorch Implementation for Fracture Detection in Wrist Bone X-ray Images

wrist-d PyTorch Implementation for Fracture Detection in Wrist Bone X-ray Images note: Paper: Under Review at MPDI Diagnostics Submission Date: Novemb

Fatih UYSAL 5 Oct 12, 2022
iris - Open Source Photos Platform Powered by PyTorch

Open Source Photos Platform Powered by PyTorch. Submission for PyTorch Annual Hackathon 2021.

Omkar Prabhu 137 Sep 10, 2022
Code and data for ImageCoDe, a contextual vison-and-language benchmark

ImageCoDe This repository contains code and data for ImageCoDe: Image Retrieval from Contextual Descriptions. Data All collected descriptions for the

McGill NLP 27 Dec 02, 2022
PyTorch code for EMNLP 2021 paper: Don't be Contradicted with Anything! CI-ToD: Towards Benchmarking Consistency for Task-oriented Dialogue System

Don’t be Contradicted with Anything!CI-ToD: Towards Benchmarking Consistency for Task-oriented Dialogue System This repository contains the PyTorch im

Libo Qin 25 Sep 06, 2022
TensorFlow 101: Introduction to Deep Learning for Python Within TensorFlow

TensorFlow 101: Introduction to Deep Learning I have worked all my life in Machine Learning, and I've never seen one algorithm knock over its benchmar

Sefik Ilkin Serengil 896 Jan 04, 2023
《Train in Germany, Test in The USA: Making 3D Object Detectors Generalize》(CVPR 2020)

Train in Germany, Test in The USA: Making 3D Object Detectors Generalize This paper has been accpeted by Conference on Computer Vision and Pattern Rec

Xiangyu Chen 101 Jan 02, 2023
This program can detect your face and add an Christams hat on the top of your head

Auto_Christmas This program can detect your face and add a Christmas hat to the top of your head. just run the Auto_Christmas.py, then you can see the

3 Dec 22, 2021
A collection of models for image<->text generation in ACM MM 2021.

Bi-directional Image and Text Generation UMT-BITG (image & text generator) Unifying Multimodal Transformer for Bi-directional Image and Text Generatio

Multimedia Research 63 Oct 30, 2022
Relaxed-machines - explorations in neuro-symbolic differentiable interpreters

Relaxed Machines Explorations in neuro-symbolic differentiable interpreters. Baby steps: inc_stop Libraries JAX Haiku Optax Resources Chapter 3 (∂4: A

Nada Amin 6 Feb 02, 2022
RIM: Reliable Influence-based Active Learning on Graphs.

RIM: Reliable Influence-based Active Learning on Graphs. This repository is the official implementation of RIM. Requirements To install requirements:

Wentao Zhang 4 Aug 29, 2022
An official implementation of "Exploiting a Joint Embedding Space for Generalized Zero-Shot Semantic Segmentation" (ICCV 2021) in PyTorch.

Exploiting a Joint Embedding Space for Generalized Zero-Shot Semantic Segmentation This is an official implementation of the paper "Exploiting a Joint

CV Lab @ Yonsei University 35 Oct 26, 2022
Fast image augmentation library and easy to use wrapper around other libraries. Documentation: https://albumentations.ai/docs/ Paper about library: https://www.mdpi.com/2078-2489/11/2/125

Albumentations Albumentations is a Python library for image augmentation. Image augmentation is used in deep learning and computer vision tasks to inc

11.4k Jan 09, 2023
Yolo ros - YOLO-ROS for HUAWEI ATLAS200

YOLO-ROS YOLO-ROS for NVIDIA YOLO-ROS for HUAWEI ATLAS200, please checkout for b

ChrisLiu 5 Oct 18, 2022
A simple Python configuration file operator.

A simple Python configuration file operator This project provides a common way to read configurations using config42. Installation It is possible to i

Scott Lau 2 Nov 08, 2021
🔥RandLA-Net in Tensorflow (CVPR 2020, Oral & IEEE TPAMI 2021)

RandLA-Net: Efficient Semantic Segmentation of Large-Scale Point Clouds (CVPR 2020) This is the official implementation of RandLA-Net (CVPR2020, Oral

Qingyong 1k Dec 30, 2022
TransNet V2: Shot Boundary Detection Neural Network

TransNet V2: Shot Boundary Detection Neural Network This repository contains code for TransNet V2: An effective deep network architecture for fast sho

Tomáš Souček 212 Dec 27, 2022
Implementation for Learning to Track with Object Permanence

Learning to Track with Object Permanence A video-based MOT approach capable of tracking through full occlusions: Learning to Track with Object Permane

Toyota Research Institute - Machine Learning 91 Jan 03, 2023
INSPIRED: A Transparent Dialogue Dataset for Interactive Semantic Parsing

INSPIRED: A Transparent Dialogue Dataset for Interactive Semantic Parsing Existing studies on semantic parsing focus primarily on mapping a natural-la

7 Aug 22, 2022
Deep Reinforcement Learning by using an on-policy adaptation of Maximum a Posteriori Policy Optimization (MPO)

V-MPO Simple code to demonstrate Deep Reinforcement Learning by using an on-policy adaptation of Maximum a Posteriori Policy Optimization (MPO) in Pyt

Nugroho Dewantoro 9 Jun 06, 2022
Unofficial implementation of Perceiver IO: A General Architecture for Structured Inputs & Outputs

Perceiver IO Unofficial implementation of Perceiver IO: A General Architecture for Structured Inputs & Outputs Usage import torch from src.perceiver.

Timur Ganiev 111 Nov 15, 2022