1. 效果:
视频链接:
https://www.bilibili.com/video/BV1Wr4y1K7Sh
最终效果:
源码已经上传 Github:
https://github.com/Sharpiless/Yolov5-Flask-VUE
2. YOLOv5模型训练:
训练自己的数据集可以看我这篇博客:
【小白CV】手把手教你用YOLOv5训练自己的数据集(从Windows环境配置到模型部署)
这里演示的话我就用官方训练好的 yolov5m.pt 模型。
3. YOLOv5模型预测:
预测接口:
import torch
import numpy as np
from models.experimental import attempt_load
from utils.general import non_max_suppression, scale_coords, letterbox
from utils.torch_utils import select_device
import cv2
from random import randint


class Detector(object):

    def __init__(self):
        self.img_size = 640
        self.threshold = 0.4
        self.max_frame = 160
        self.init_model()

    def init_model(self):

        self.weights = 'weights/yolov5m.pt'
        self.device = '0' if torch.cuda.is_available() else 'cpu'
        self.device = select_device(self.device)
        model = attempt_load(self.weights, map_location=self.device)
        model.to(self.device).eval()
        model.half()
        # torch.save(model, 'test.pt')
        self.m = model
        self.names = model.module.names if hasattr(
            model, 'module') else model.names
        self.colors = [
            (randint(0, 255), randint(0, 255), randint(0, 255)) for _ in self.names
        ]

    def preprocess(self, img):

        img0 = img.copy()
        img = letterbox(img, new_shape=self.img_size)[0]
        img = img[:, :, ::-1].transpose(2, 0, 1)
        img = np.ascontiguousarray(img)
        img = torch.from_numpy(img).to(self.device)
        img = img.half()  # 半精度
        img /= 255.0  # 图像归一化
        if img.ndimension() == 3:
            img = img.unsqueeze(0)

        return img0, img

    def plot_bboxes(self, image, bboxes, line_thickness=None):
        tl = line_thickness or round(
            0.002 * (image.shape[0] + image.shape[1]) / 2) + 1  # line/font thickness
        for (x1, y1, x2, y2, cls_id, conf) in bboxes:
            color = self.colors[self.names.index(cls_id)]
            c1, c2 = (x1, y1), (x2, y2)
            cv2.rectangle(image, c1, c2, color,
                          thickness=tl, lineType=cv2.LINE_AA)
            tf = max(tl - 1, 1)  # font thickness
            t_size = cv2.getTextSize(
                cls_id, 0, fontScale=tl / 3, thickness=tf)[0]
            c2 = c1[0] + t_size[0], c1[1] - t_size[1] - 3
            cv2.rectangle(image, c1, c2, color, -1, cv2.LINE_AA)  # filled
            cv2.putText(image, '{} ID-{:.2f}'.format(cls_id, conf), (c1[0], c1[1] - 2), 0, tl / 3,
                        [225, 255, 255], thickness=tf, lineType=cv2.LINE_AA)
        return image

    def detect(self, im):

        im0, img = self.preprocess(im)

        pred = self.m(img, augment=False)[0]
        pred = pred.float()
        pred = non_max_suppression(pred, self.threshold, 0.3)

        pred_boxes = []
        image_info = {}
        count = 0
        for det in pred:
            if det is not None and len(det):
                det[:, :4] = scale_coords(
                    img.shape[2:], det[:, :4], im0.shape).round()

                for *x, conf, cls_id in det:
                    lbl = self.names[int(cls_id)]
                    x1, y1 = int(x[0]), int(x[1])
                    x2, y2 = int(x[2]), int(x[3])
                    pred_boxes.append(
                        (x1, y1, x2, y2, lbl, conf))
                    count += 1
                    key = '{}-{:02}'.format(lbl, count)
                    image_info[key] = ['{}×{}'.format(
                        x2-x1, y2-y1), np.round(float(conf), 3)]

        im = self.plot_bboxes(im, pred_boxes)
        return im, image_info
处理完保存到服务器本地临时的目录下:
import os

def pre_process(data_path):
    file_name = os.path.split(data_path)[1].split('.')[0]
    return data_path, file_name
import cv2

def predict(dataset, model, ext):
    global img_y
    x = dataset[0].replace('\\', '/')
    file_name = dataset[1]
    print(x)
    print(file_name)
    x = cv2.imread(x)
    img_y, image_info = model.detect(x)
    cv2.imwrite('./tmp/draw/{}.{}'.format(file_name, ext), img_y)
    return image_info
from core import process, predict


def c_main(path, model, ext):
    image_data = process.pre_process(path)
    image_info = predict.predict(image_data, model, ext)

    return image_data[1] + '.' + ext, image_info


if __name__ == '__main__':
    pass
4. Flask 部署:
然后通过Flask框架写相应函数:
@app.route('/upload', methods=['GET', 'POST'])
def upload_file():
    file = request.files['file']
    print(datetime.datetime.now(), file.filename)
    if file and allowed_file(file.filename):
        src_path = os.path.join(app.config['UPLOAD_FOLDER'], file.filename)
        file.save(src_path)
        shutil.copy(src_path, './tmp/ct')
        image_path = os.path.join('./tmp/ct', file.filename)
        pid, image_info = core.main.c_main(
            image_path, current_app.model, file.filename.rsplit('.', 1)[1])
        return jsonify({'status': 1,
                        'image_url': 'http://127.0.0.1:5003/tmp/ct/' + pid,
                        'draw_url': 'http://127.0.0.1:5003/tmp/draw/' + pid,
                        'image_info': image_info})

    return jsonify({'status': 0})
这样前端发出POST请求时,会对上传的图像进行处理。
5. VUE前端:
主要是通过VUE编写前端WEB框架。
核心前后端交互代码:
	// 上传文件
    update(e) {
      this.percentage = 0;
      this.dialogTableVisible = true;
      this.url_1 = "";
      this.url_2 = "";
      this.srcList = [];
      this.srcList1 = [];
      this.wait_return = "";
      this.wait_upload = "";
      this.feature_list = [];
      this.feat_list = [];
      this.fullscreenLoading = true;
      this.loading = true;
      this.showbutton = false;
      let file = e.target.files[0];
      this.url_1 = this.$options.methods.getObjectURL(file);
      let param = new FormData(); //创建form对象
      param.append("file", file, file.name); //通过append向form对象添加数据
      var timer = setInterval(() => {
        this.myFunc();
      }, 30);
      let config = {
        headers: { "Content-Type": "multipart/form-data" },
      }; //添加请求头
      axios
        .post(this.server_url + "/upload", param, config)
        .then((response) => {
          this.percentage = 100;
          clearInterval(timer);
          this.url_1 = response.data.image_url;
          this.srcList.push(this.url_1);
          this.url_2 = response.data.draw_url;
          this.srcList1.push(this.url_2);
          this.fullscreenLoading = false;
          this.loading = false;

          this.feat_list = Object.keys(response.data.image_info);

          for (var i = 0; i < this.feat_list.length; i++) {
            response.data.image_info[this.feat_list[i]][2] = this.feat_list[i];
            this.feature_list.push(response.data.image_info[this.feat_list[i]]);
          }

          this.feature_list.push(response.data.image_info);
          this.feature_list_1 = this.feature_list[0];
          this.dialogTableVisible = false;
          this.percentage = 0;
          this.notice1();
        });
    },
这段代码在点击提交图片时响应:
		<div slot="header" class="clearfix">
            <span>检测目标span>
            <el-button
              style="margin-left: 35px"
              v-show="!showbutton"
              type="primary"
              icon="el-icon-upload"
              class="download_bt"
              v-on:click="true_upload2"
            >
              重新选择图像
              <input
                ref="upload2"
                style="display: none"
                name="file"
                type="file"
                @change="update"
              />
            el-button>
          div>
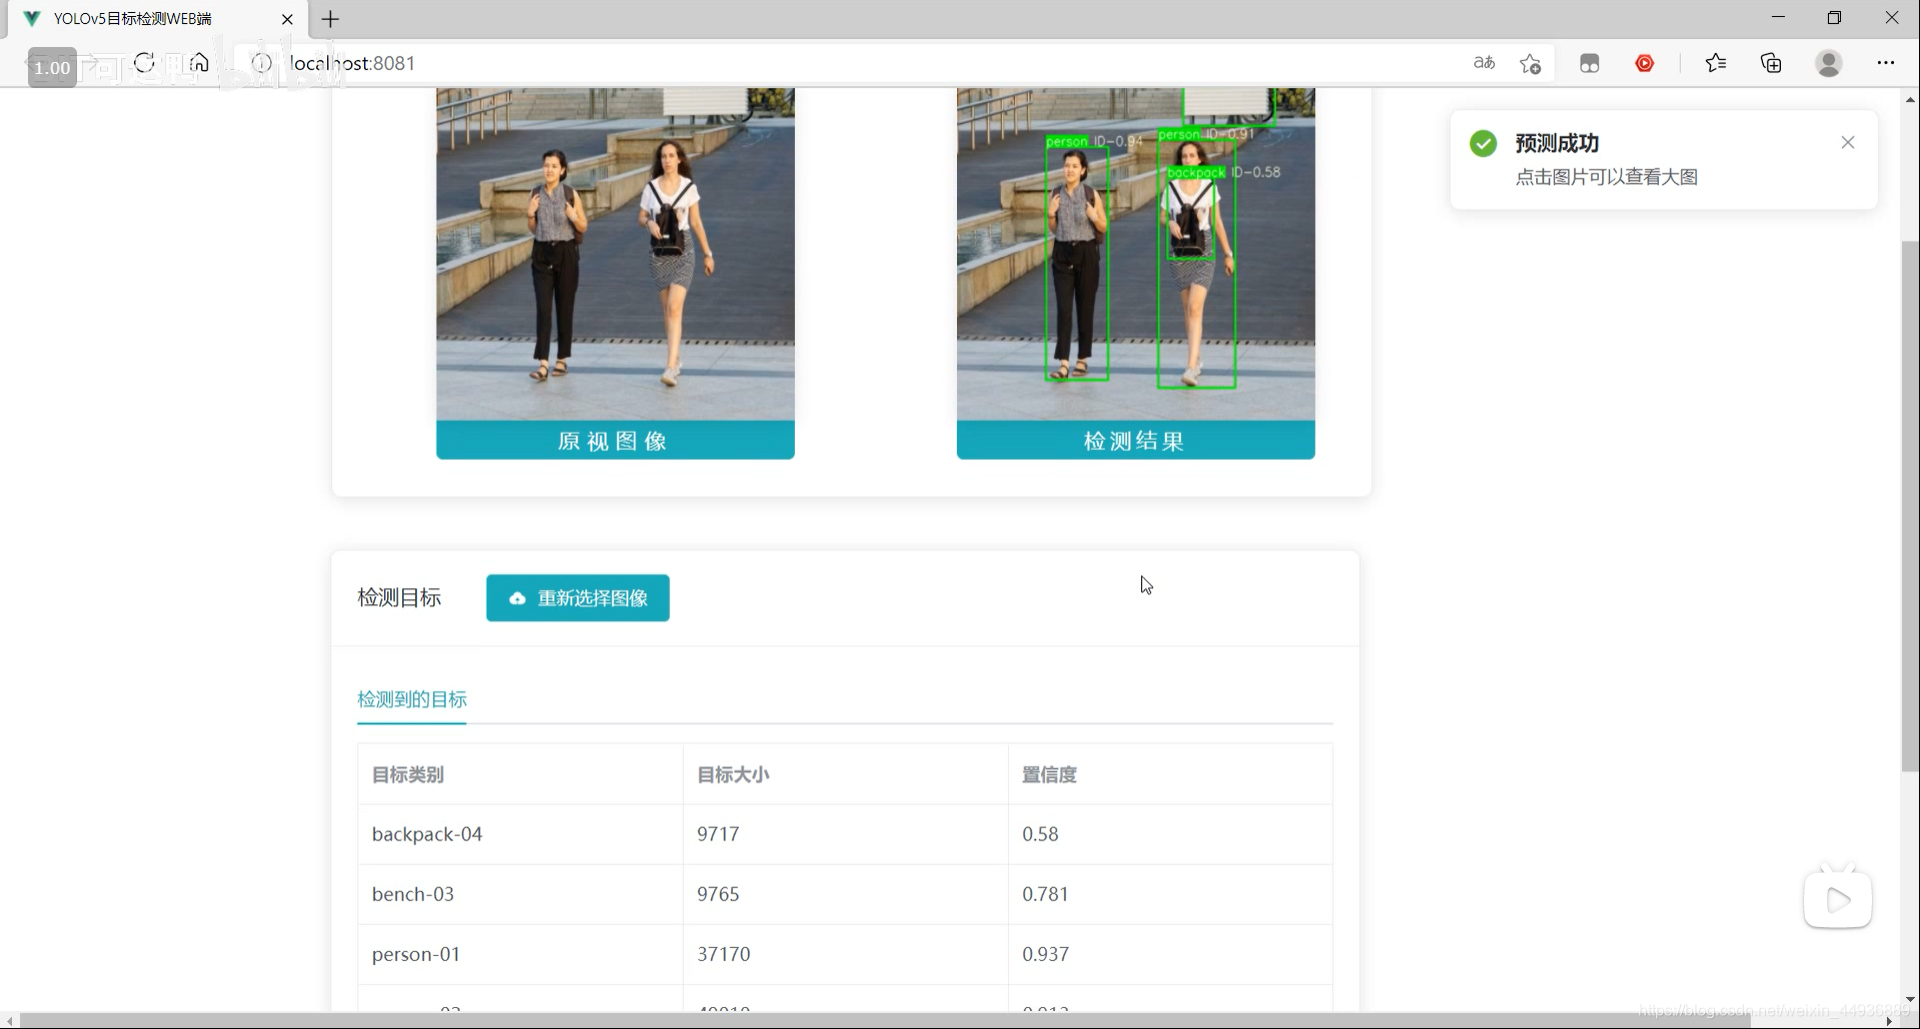
6. 启动项目:
在 Flask 后端项目下启动后端代码:
python app.py
在 VUE 前端项目下,先安装依赖:
npm install
然后运行前端:
npm run serve
然后在浏览器打开localhost即可:
关注我的公众号:
感兴趣的同学关注我的公众号——可达鸭的深度学习教程:


 6 Dec 29, 2021
 31 Dec 08, 2022
 55 Nov 02, 2022
 37 Dec 28, 2022
 7 Nov 13, 2022
 7.4k Jan 04, 2023
 44 Dec 14, 2022
 6 Aug 16, 2022
 10 Nov 20, 2022
 1 Nov 13, 2021
 166 Dec 28, 2022
 6k Jan 06, 2023
 1 Feb 01, 2022
 1.2k Jan 05, 2023
 22 Oct 20, 2022
 35 Jan 06, 2023
 271 Jan 01, 2023
 42 Dec 23, 2022
 58 Dec 18, 2022
 116 Nov 24, 2022